There are a lot of ways to make money online, but one of the best is to start an online store. But if you don’t have a lot of experience creating websites or selling products and services, where do you even start?


Fear not. Fortunately, a few simple tools make it surprisingly easy to get your feet wet in the world of e-commerce. By using WordPress as your website’s platform and leveraging the WooCommerce plugin to actually build your store, you can be up and running in an hour — or about the amount of time it takes to watch an episode of your favorite Netflix show. The process will still require some upfront work, but it is totally manageable (even if you’re a newbie!).
In this comprehensive guide, we’ll provide you with everything you need to get your online shop off the ground. We’ll discuss the advantages of using both WordPress and WooCommerce and walk you through setting up your store and creating products. Finally, we’ll offer some tips for designing and promoting your site effectively.
An Introduction to E-Commerce
If you’ve never heard of e-commerce before, it’s a blanket term that refers to buying and selling goods or services online. So if you’ve ever purchased something on the internet, you’ve engaged in e-commerce.
We probably don’t have to tell you how vast and complex the world of e-commerce has become. You can buy nearly anything online, from toothbrushes to houses, and most items are offered by multiple sellers. What’s more, you can purchase digital products, services, and all sorts of other non-physical products as well. This means that if you’re interested in becoming a seller yourself, you’re going to have a lot of competition. Don’t be intimidated — it is possible to start your own online store and do quite well. However, you’ll have to put some work in first. The first step is choosing the best tools to build your store.
Why You Should Consider WordPress for Your E-Commerce Store
While there are other options, such as selling your products through an existing marketplace like Amazon, most people get their e-commerce start by creating their own store. Of course, an online store is just another kind of website. So your first decision will be picking a platform to build your website.
If you aren’t sold on a particular platform already, we highly recommend WordPress. This free, open-source Content Management System (CMS) is a standout choice for websites of all types. It’s beginner-friendly but so flexible and customizable that you can build almost any site with it.
WordPress got its start as a blogging platform, but it’s now used for business websites, portfolios, news sites, and much more. It’s also an incredibly popular choice with business owners for e-commerce sites for a number of reasons:
- The WordPress community has developed thousands of themes and plugins you can use to customize your site, including many tools for e-commerce. This means you can tweak the appearance of your store until it’s just right and add nearly any feature to it, whether you’re running a massive enterprise or a small business.
- As a platform, WordPress is very secure. New updates and patches are regularly released to combat the latest threats. Plus, there are a lot of ways you can boost site security. This is a big deal for e-commerce sites since they typically deal with sensitive financial data.
- There’s a vast community out there to support you. Getting involved in e-commerce can be tricky. No matter what question or problem you have, however, there will be plenty of people who can help you out.
You really can’t go wrong with WordPress for building your online store — no matter how big you want it to be or what you plan to sell. The only caveat is that, out of the box, the platform doesn’t provide dedicated e-commerce features. However, that issue can be quickly resolved by installing the right WordPress plugin.
An Introduction to WooCommerce

There are multiple plugins that can add e-commerce capabilities to your WordPress site. None of them can truly compete with WooCommerce. This free WordPress plugin is the most popular solution for online stores within the platform — and for good reason. Like WordPress itself, WooCommerce is both easy to get started with and endlessly flexible. Installing the WooCommerce plugin will immediately add all sorts of useful e-commerce functionality to your site, such as product pages, a checkout option, and a payment system. It offers a number of useful settings and options, so you can tweak your store to meet your exact needs.
WooCommerce works well for selling physical items, digital products, or both. Whether you’re starting up a small store to sell a few downloads or hoping to move hundreds of products a day, WooCommerce has you covered.
Key Features
- Enables you to create dedicated, customizable pages for each product or service.
- Adds a checkout feature to your site so visitors can make purchases directly.
- Includes various options for payment methods and shipping.
Pricing
WooCommerce is a free plugin and is, in many cases, suitable on its own. If you want to expand its capabilities, however, there’s an extension store offering all kinds of additional features.
What to Do Before Building Your Online Store
In a moment, we’ll walk you through how to set up an online store using WordPress and WooCommerce. However, there are two things you’ll want to do first. In order for your store to be available online, you’ll need both a domain name and a WordPress hosting plan. Your domain name is the part of your site’s URL that comes after the www — for example, dreamhost.com. Purchasing a domain is simple. You’ll have to pay an upfront cost, then a renewal fee each year, but these are usually quite affordable. 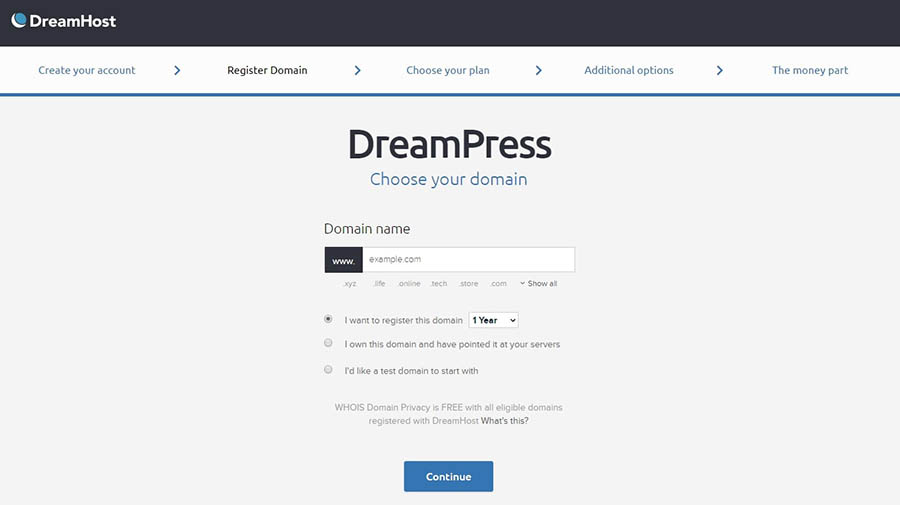

You can think of your domain like an address. It’s one of the key ways people will find you, so it’s important to make your choice carefully. Try to pick something simple and clear but also memorable enough to stand out. Take the time now to find something you’re happy with, so you don’t have to go through the hassle of changing your domain later.
If your domain is your site’s address, your hosting is where it ‘lives.’ Your web host provider will store your site’s files on its servers, so anyone with an internet connection can access it. There are many web host options, a lot of which are quite cheap. However, it’s best not to rush this decision either. After all, your web host will affect your site’s performance, security, optimization, and much more.
If you want to run a successful store, these elements are crucial. In addition, you’ll want to look for a host with a solid reputation, excellent support options, and — ideally — WordPress-specific features. It’s also best to select one with solid domain services since it’s easier to manage your hosting and domain in one place.
Related: Why You Should Consider Keeping Domain Registration and Web Hosting Under One Roof
Since you’ll be setting up a WooCommerce store, you should definitely check out our WooCommerce hosting. This plan is optimized for WordPress and comes with WooCommerce pre-installed (along with some other helpful tools). You’ll get lots of storage and resource scaling options so you can grow your store, and plenty of support for those times when you need help. Plus, it’s very affordable.Your Store Deserves WooCommerce Hosting
Sell anything, anywhere, anytime on the world's biggest eCommerce platform with optimized hosting, starting at $16.95/mo.
Choose Your Plan

Before we move on, let’s talk a little bit about security. As we’ve mentioned, keeping your online store safe from hackers and malware is essential. One smart way to do this is through the use of HTTPS, which is a more secure version of the HTTP you see at the beginning of many URLs. If you want your site to run on HTTPS, you’ll need a Secure Sockets Layer (SSL) certificate. We mention this now because, while you can get an SSL certificate through an external source, it’s easiest to obtain it as part of your hosting. For example, our WooCommerce hosting plan includes a free, preinstalled Let’s Encrypt SSL certificate. This way, your store will be even more secure right from the very start. SSL certificates are important for most sites these days, but they’re a must-have for e-commerce stores.
How to Start an Online Store in 1 Hour
Once you have a hosting plan picked out and a domain in place, you’re ready to start building your online store! Let’s walk through the process, step by step. No developers required.
1. Install WordPress (5 Minutes)
The first thing you’ll need to do to get your new website up and running is install WordPress. How you do this will vary, depending on your choice of host. In some cases, you may be able to skip this step altogether. For example, if you opt for our WooCommerce hosting (or our regular DreamPress plan), WordPress will be pre-installed so you don’t have to worry about it. If you have a different host or type of plan, you’ll need to log into your hosting account, find the installation button or link, and follow the resulting prompts. If you’re lucky, your host will simplify the process even if WordPress doesn’t come pre-installed. For example, on some of our more basic hosting plans, we offer a one-click install option. You simply need to visit your Dreamhost panel and navigate to WordPress > One-Click Installs. 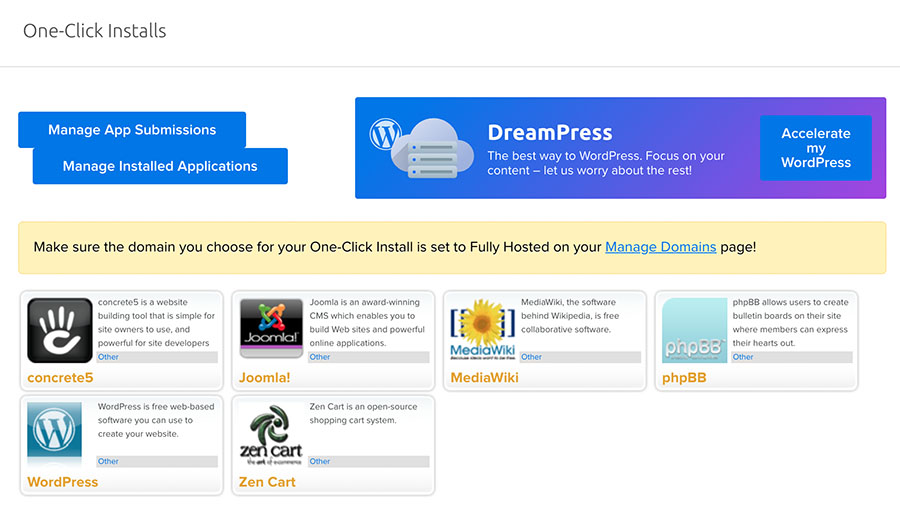

Select WordPress on the next screen, and you’ll be presented with a few fields to fill out. You can select the domain to use under Install to.
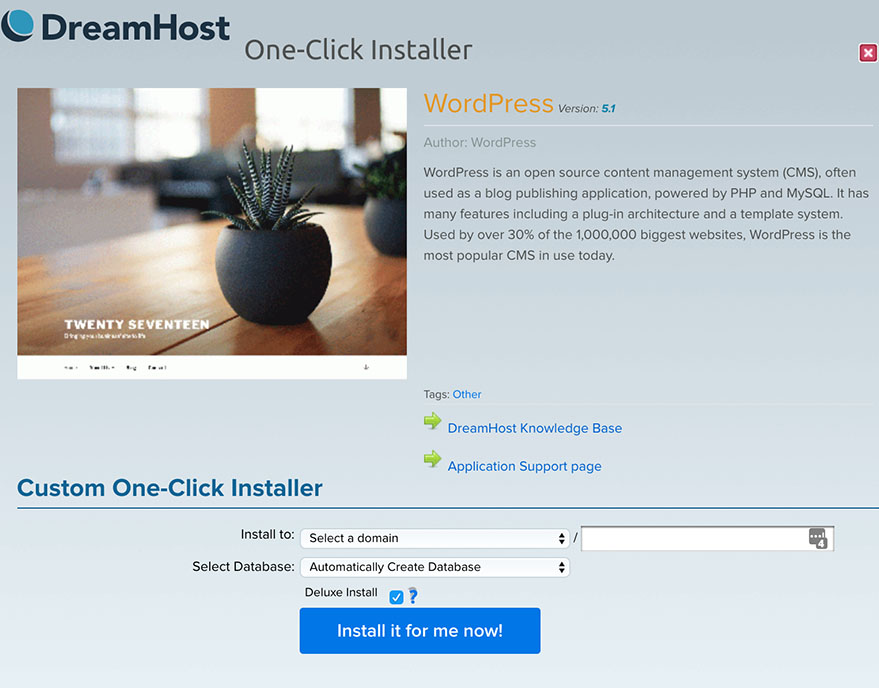
You can usually leave the other fields alone since they contain more advanced options. Check the Deluxe Install button if you want your site to come with some handy themes and plugins pre-installed, then select Install it for me now! After that, you’ll be sent an email at the address associated with your DreamHost account. It will contain your username and a link to your new site. Finally, in some cases, you may need to install WordPress manually. This is a little more involved, requiring a few additional tools, but can still be completed in less than five minutes. If you find yourself in that situation, we recommend following WordPress’ own handy installation tutorial.
2. Install and Configure WooCommerce (10 Minutes)
Next up, we have another step you may be able to skip entirely. After all, our WooCommerce hosting comes with the plugin pre-installed and pre-configured. This way, you’re ready to start building your online store from the moment you first visit your new site. Still, let’s walk through the process of manually installing WooCommerce and setting it up, in case you have a different plan. You’ll first need to visit your WordPress site, navigate to the Plugins tab, and select the Add New button at the top of the screen. 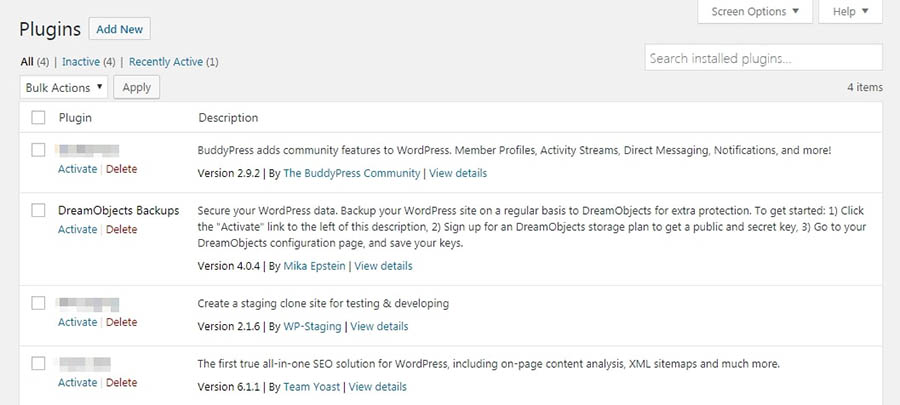

Type “WooCommerce” into the search field and the plugin should come up right away. Click on Install Now, and wait a few moments. A new button should appear, called Activate, which you’ll need to click.
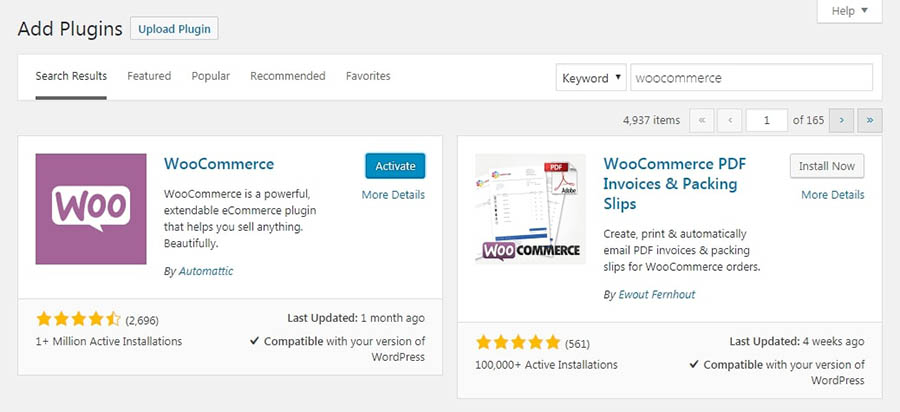
That’s all you need to do to add the plugin to your site. It’s now ready to use and will automatically set up the essential pages you’ll need for your store (such as a shopping cart and checkout page). However, we recommend walking through the short setup wizard to configure a few key options.
This wizard should appear right after you install the plugin. On the first page, you’ll enter a few key details about your store. This includes where it’s located, what currency it will use, and what types of products you’re planning to sell.
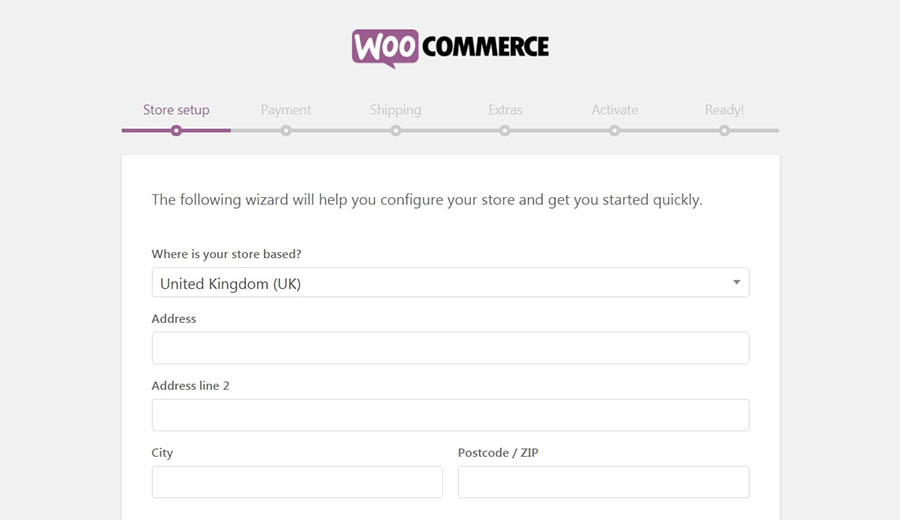
Keep in mind that you can go back and change any of these settings later. Next, you’ll select the payment options that will be available to your customers.
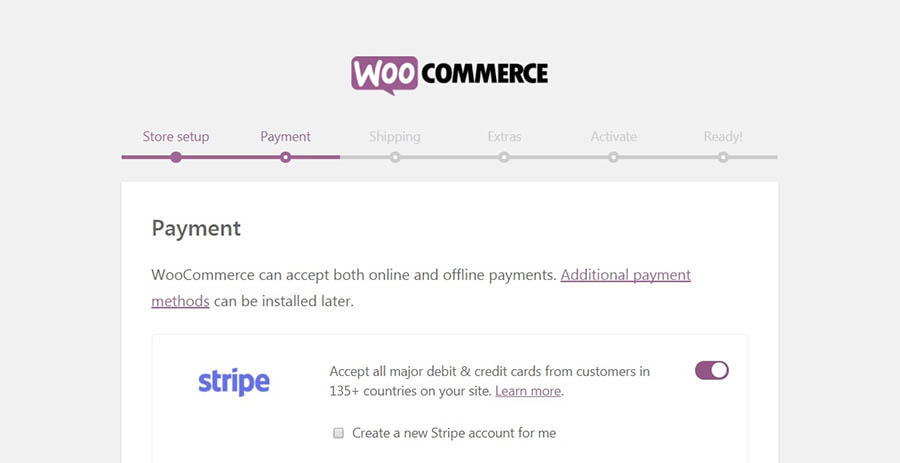
By default, you can choose any combination of Stripe, PayPal, and offline payments. If those options aren’t enough, you can always add more through extensions.
Click on Continue, and you’ll be able to configure your standard shipping rates. You can choose from either free shipping or a flat fee (again, more options are available in the extension store).
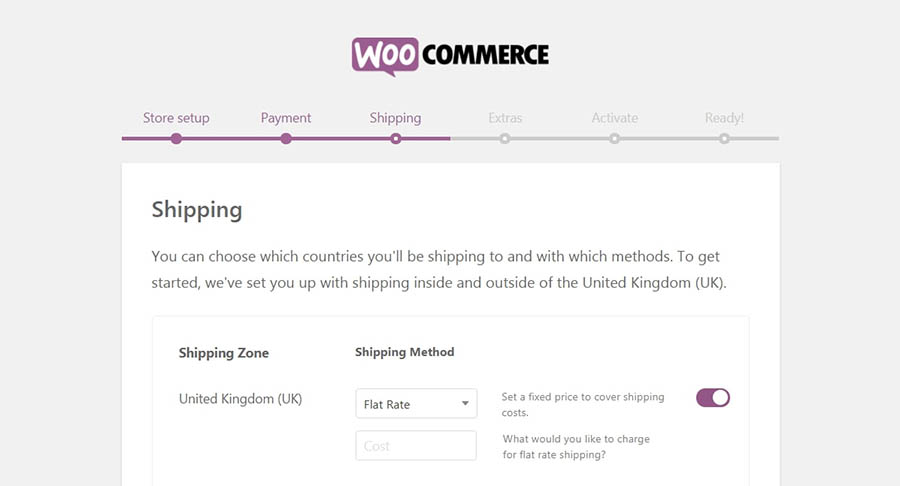
The next two screens offer a couple of extra tools, which you can safely skip for now. Keep moving through until you reach the Ready! step.
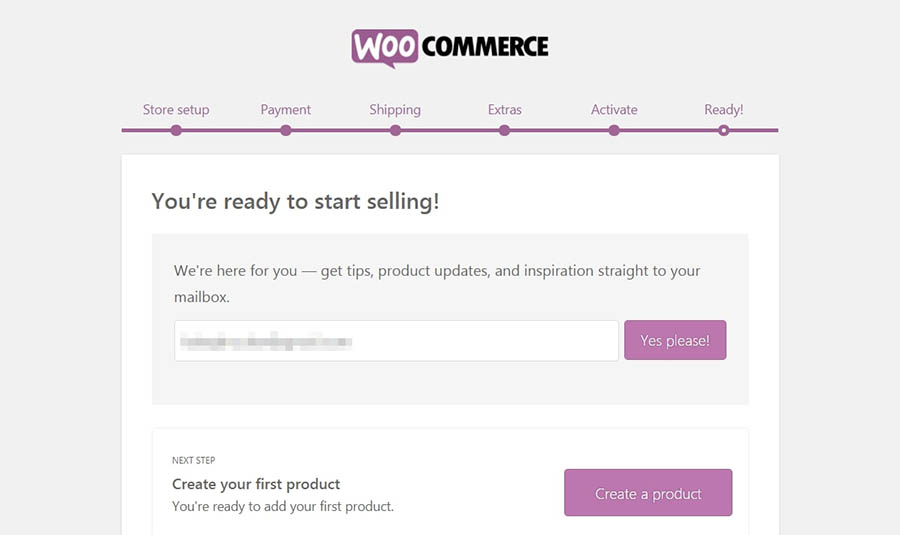
This lets you know you’re done with the setup wizard. There are a few handy links here, such as one to create your first product. We’ll get to that in a moment. First, however, we want to optimize WooCommerce a bit more fully, so select Return to your dashboard instead.
3. Optimize WooCommerce’s Settings (15 Minutes)
The WooCommerce wizard gets your store up and running. However, there are a lot more settings within the plugin to configure. To set up a unique store tailored to your requirements, you may need to spend some additional time tweaking it.
To get started, visit WooCommerce > Settings in your admin panel.
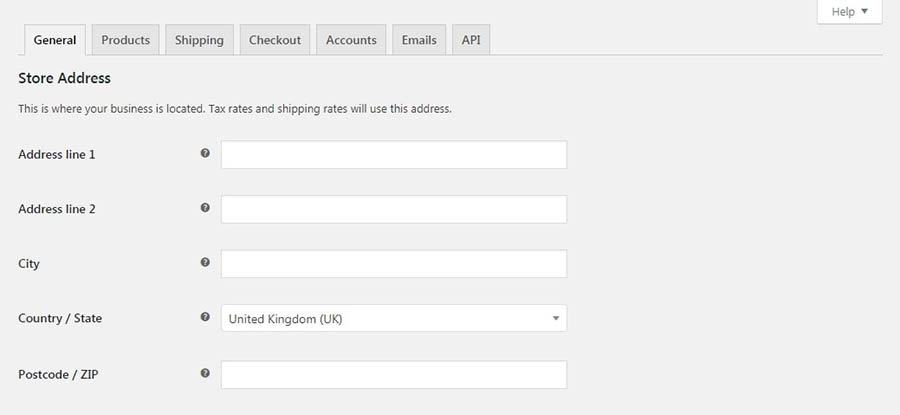
There are a lot of options here. We won’t go through all of them, but we’ll touch on some of the highlights.
For example, under the General tab, you can choose what countries you’re willing to sell and ship to and decide whether to enable taxes. The latter is usually a smart idea since neglecting to collect taxes from your customers can leave you facing a hefty bill at the end of the year. If you’re new to the world of sales tax, the WooCommerce documentation offers a handy guide for understanding it. In the Products tab, you’ll see the same measurement units you set up in the WooCommerce wizard. However, you’ll also find some options related to reviews. 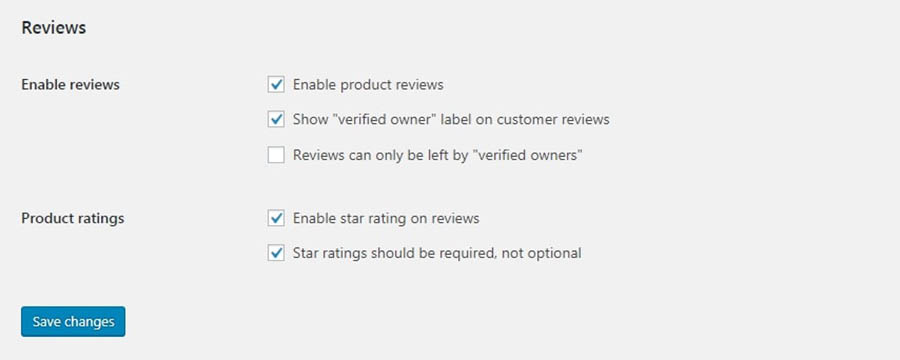

You can let customers leave reviews on products, and even give star ratings. This can encourage new visitors to purchase — as long as the reviews are positive! The rest of the sub-tabs here help you customize how products will be displayed, and determine how inventory will be managed. The Shipping tab enables you to add more shipping zones, if you’d like, to further customize your methods and rates. You can also configure how shipping works under the Shipping options sub-tab. 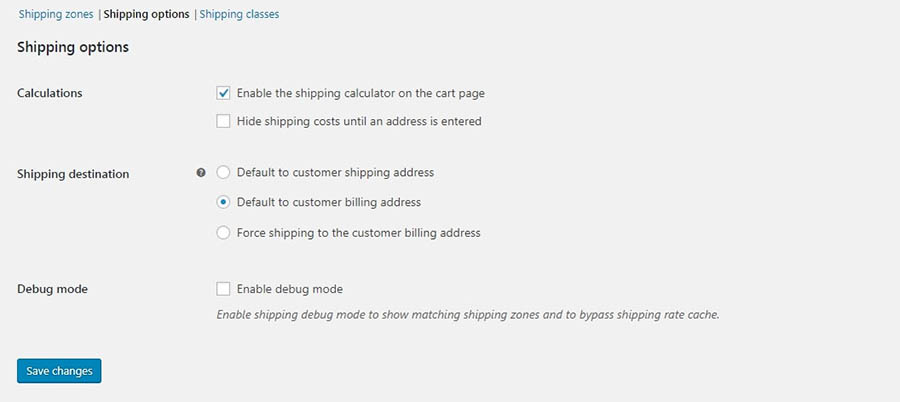

Moving on, under Payments, you’ll find a variety of settings. You can start by deciding how to accept payments from customers, including through in-person transactions such as bank transfers, checks, and cash. You can also manage default payment gateways such as PayPal.
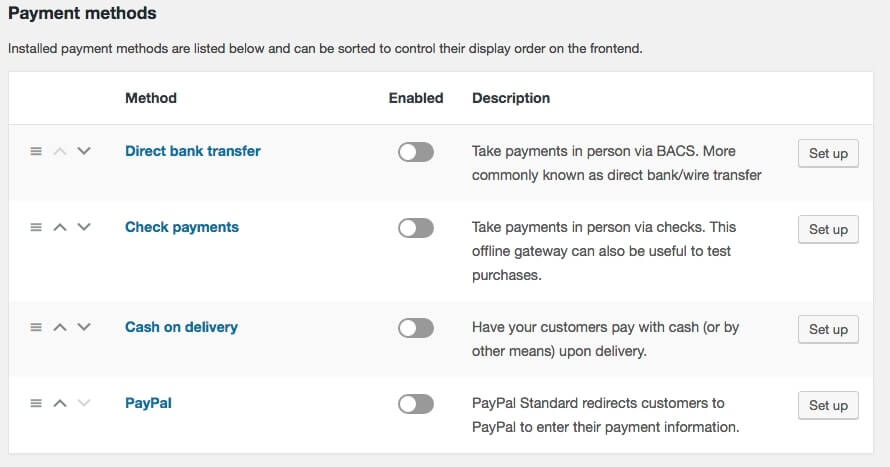
By selecting a particular sub-tab, you can navigate to a screen containing settings that are unique to each type of payment. There, you can configure each payment type further.
Related: The 10 Most Popular Online Payment Gateways for Your Website, Compared
We’re almost done! The next tab, Accounts, lets you set up how customers’ accounts will work. For example, you can determine where they’ll register on your site and how accounts will be created.

Under Emails, you can customize what types of notifications will be sent to which email addresses. At the bottom of the page, you’ll also have some options for personalizing what emails sent from your store to customers will look like.
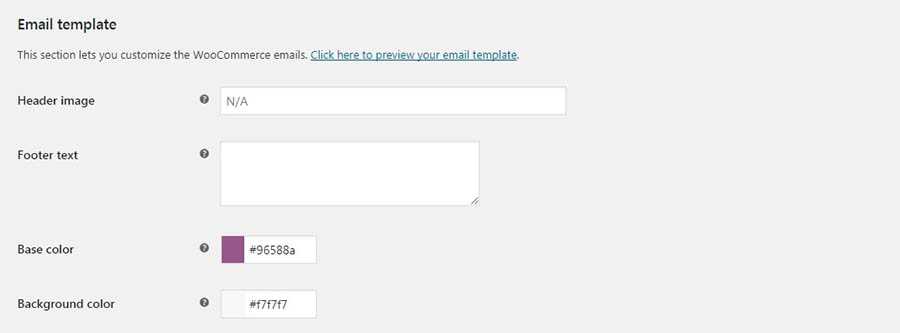
The last tab, API, contains some more technical settings for advanced users and can be safely ignored for now. With that, you’ve made your way through the entire WooCommerce settings page! You can always return here and make changes whenever you’d like, as you start building your store and getting a feel for how you’d like it to work.
4. Add Your First Product (30 Minutes)
With your store all set up, it’s finally time to start adding products! Fortunately, WooCommerce makes the process pretty simple. To add your first item, navigate to Products > Add New in your dashboard.
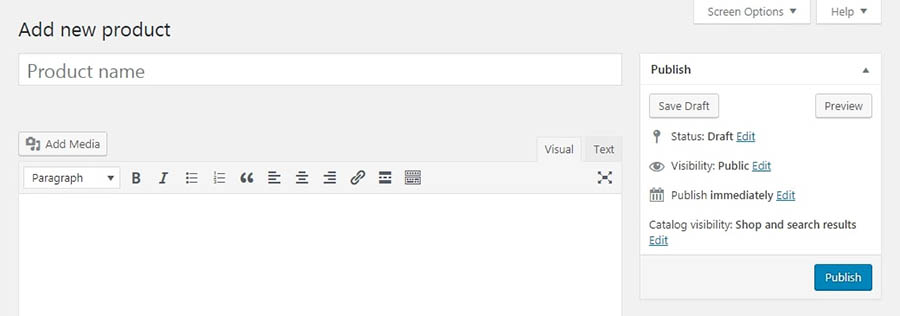
If you’ve ever created a WordPress website before, this screen should look very familiar. In many ways, it’s identical to the Classic Editor (which has recently been replaced by the Block Editor). Of course, there are a number of new options and settings. Start out by scrolling down to the Product data section. Here, you can choose what type of item this product is, whether it’s downloadable, and what its price should be. 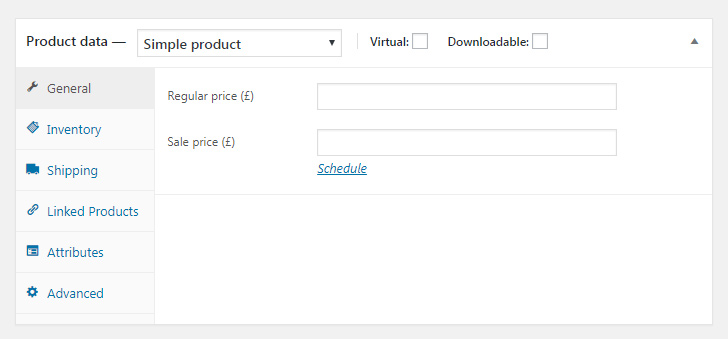

Under the next tab, Inventory, you can create an SKU (or unique identifier) for the product and configure a few other behind-the-scenes options. Then under Shipping, you can enter the product’s weight and dimensions and choose its shipping class if applicable. The rest of the choices in this section are pretty optional, although we’d recommend checking out the Linked Products tab. Here, you can determine what kinds of related products will be promoted to visitors, which is a smart way to increase sales. At the bottom of the page, you’ll find the Product short description section. 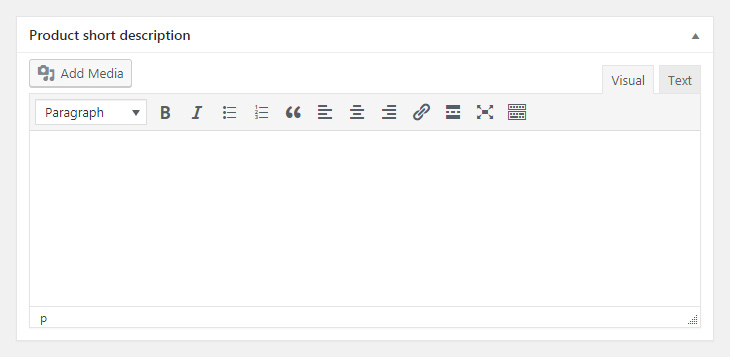

This is where you can enter a summary of the item, which will appear on your product listings’ pages. Keep it brief and focus on the key selling point. In other words, how does this product solve a crucial problem or make your customers’ lives easier? Scrolling back up, the main editor is where you can enter a full description of your product. Be as thorough as possible here, highlighting its essential features and providing all the information a customer will need to make an informed choice. Most importantly, don’t forget to use the Add Mediabutton to include images of the product, ideally from multiple perspectives. The better potential customers can visualize the item, the more likely they’ll be to open their wallets. To enter a main, featured image for the item, you can use the Product image section in the right-hand column. Just under that, there’s an option to create a Product gallery, which is an excellent idea if your item comes in multiple styles or colors. Also in this column, you can add a category and tags to your product. 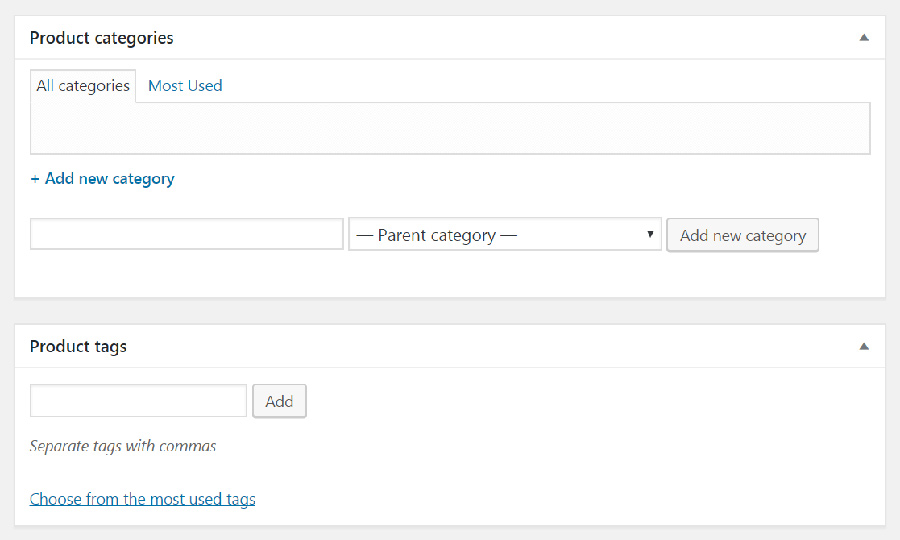

This is recommended for a couple of reasons. First, it helps you keep everything organized. Second, it makes it easier for both potential customers and search engine bots to find your products and understand what they are. When you have everything set up the way you’d like, simply click on Publish to make your product live! Then you can repeat the process for each additional item. You can always come back and make changes to your existing product pages if information or images need to be updated.
5. Choose a WooCommerce-Compatible Theme (Optional)
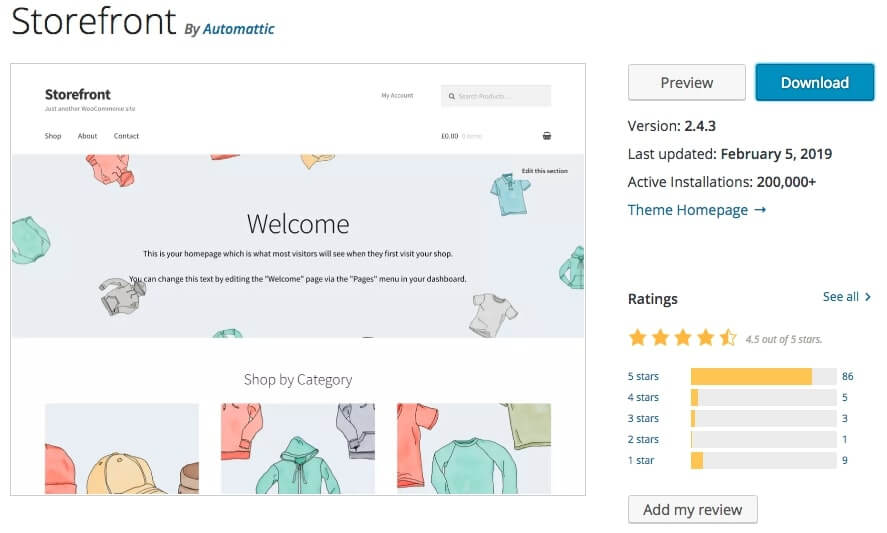
Your store is now set up, and you’re ready to start selling products. However, let’s address one more optional step. One of the nice things about using WordPress to create your online store is that you can use any theme you want to customize its appearance.
However, you may want to try out a theme that’s specifically designed for WooCommerce instead. This way, your theme will be optimized to work alongside the plugin’s unique features and fit its style. In addition, you’ll often get access to useful content types and functionality that will help you tweak your store further. For most people, the best choice here will be the Storefront theme. This is WooCommerce’s official theme and is built from the ground up to integrate with the plugin. It offers flexible design and display options, and you can customize it to match your branding. Storefront is free, although there are extensions you can use to add more options.
Another bonus? If you sign up for DreamHost’s WooCommerce hosting plan, you’ll have Storefront pre-installed. If you don’t like the look of Storefront, however, there are plenty of other themes you can use. ThemeForest, for example, offers a range of premium themes designed for the plugin. No matter where you get your WooCommerce theme, make sure to take your time and choose carefully. A quality theme can do a lot to improve your store’s odds of success.
Related: How to Customize WooCommerce With a Child Theme (In 3 Steps)
Tips for Improving Your WooCommerce Store’s Design

Before we wrap this guide up, we want to address two more crucial elements. First up, let’s talk about your store’s design. With both WooCommerce and a theme like Storefront installed, it should be looking pretty spiffy. As you’re building your store and tweaking its appearance, here are a few tips to keep in mind:
- Incorporate your branding throughout your store, and use its elements consistently. This includes your logo, tagline, color scheme, typography, and so on. If you haven’t developed any branding yet, now is the time to get started.
- Make sure your store is easy to navigate and search. If people can’t find the products they need quickly, they’ll probably move on to a different store. This means including a prominent search bar and organizing your items through hierarchical categories.
- Include plenty of images all across your site, not just on your product pages. More importantly, ma ke sure all the images you use are high quality and optimized to show off your items without slowing down your pages.
- Try to avoid clutter. Keep the focus on what you’re selling and don’t confuse visitors with too much information. A minimalist design can go a long way for an e-commerce business.
Promoting Your WooCommerce Store

Finally, we’d be remiss not to mention the importance of promoting your online store. Simply hoping people will stumble across it in search engines won’t be enough — you’ll need to get out there and do some marketing. Again, this is a pretty complex topic, and no one approach is right for every store. So let’s run through some of the best ways to promote your e-commerce site and provide some resources you can use to learn more about each one:
- Pay-Per-Click (PPC) advertising — This strategy is as simple as it gets. You pay a website like Google to have your store appear in relevant searches. Even better, you only pay when someone actually clicks on one of your ads.
- Email marketing — Building an email list is a hugely popular strategy. You can capture the emails of interested parties, and then send them targeted messages and promotions. Plus, you can do this right from your WordPress site, using a plugin such as OptinMonster.
- Social media marketing — Everyone is plugged into social media these days, so it’s the perfect place to find potential customers. You’ll just need to choose the right platforms to focus on, then use a few basic strategies to get the word out there about your store.
- Promotions and discounts — Putting your products on sale or running a special promotion is a smart way to drum up interest and convince people to give you a try. WooCommerce offers its own features to help you do this, and you can also combine this approach with your email and social media marketing.
Promoting your e-commerce site takes some effort. Just remember that the more channels you use, the better your chances will be for getting lots of eyes on your products or services. The work of promotion is something to focus on before, during, and after the actual launch of your online store.
Selling, Selling, Gone
Getting started with e-commerce has never been easier, thanks to all the dedicated tools and solutions that are now available. However, it takes some work to ensure that you stand out from the crowd. Understanding how to build, perfect, and promote your online store beforehand is crucial to its success.
When choosing the right platforms for your e-commerce store, you can’t go wrong with WordPress and WooCommerce. First, you’ll need to pick a domain and then select a hosting plan.
Do you have any questions about the platform or how to build your WooCommerce shop? Join the DreamHost Community today and ask us anything!


0 comments:
Post a Comment
Subscribe to Perfect BloggersTech by Email
Don't Spam Here ! You will Be Blocked Permanently