Meet The Author

Main Uddin is one of the pioneer blogger cum e-marketer from North East India(Assam).He is also a Skilled web Developer and regular columnist for various news portals around the globe.Read More

author

Instantly fix Feedburner feeds as not updating issue in WordPress Website

Leave a Comment
We have discussed more Feedburner on how to setup Feedburner feeds for WordPress and the importance of Feedburner for SEO.  For verifying Technorati claim token a few days back when we checked our Feedburner feed it seemed like our feeds were not updated for several posts and it gave as a big shock. After several types of research we found out the solution for Feedburner feeds not updating issue in WordPress and we are here to help with that problem.

How to fix Feedburner feeds not updating issue in WordPress

Step 1 Check for errors

Login to your Feedburner account and you will see Feed medic alerts which monitors the health of your feed and notifies you if anything bad with your source feed. Click on that link and check whether your feed has problems. In our case it’s clear which says “your source feed is now working fine”
Fix Feedburner feeds not updating issue in wordpress
We suggest you to check your feeds with Feed validator. Is it a valid RSS. Fix Feedburner feeds not updating issue in wordpress

Step 2 Activate Ping Shot and Ping Feedburner

Have you followed this article on how to setup Feedburner feeds for WordPress then you might be activated Ping Shot. Go to your Feeds publicize tab and you will see Ping Shot, open and activate Ping Shot.
Fix Feedburner feeds not updating issue in wordpress
Feedburner usually takes 30-minute interval to update your feeds instead of that you can manually ping your blog feeds which updates immediately. Use this link ping Feedburner and enter your blog address and Ping Feedburner. Check your feeds whether the problem is resolved and if not proceed to step 3.

Step 3 – Is your Feed size is less than 512k

Usually, Feedburner will not process if the blogs original feed size is greater than 512k which applies to actual feeds and not for media files. To know the size of your feed use this service Web-Sniffet and enter your feed address.
Try this: Reduce the number of feeds in your WordPress reading settings. Check whether the problem is resolved if not proceed to step 4.
Fix Feedburner feeds not updating issue in wordpress

Step 4 Resync your Feeds

For most people doing this step will solve the problem with Feedburner feeds not updating issue, but for us this too didn’t help.
In your Feedburner dashboard go to Troubleshootize tab and you can see some most common problems with Feedburner and solutions. Just scroll down and you can see “The nuclear option: Resyncing Your Feed” click Resync now button which clears the cached version and refreshes the original Feed.
Fix Feedburner feeds not updating issue in wordpress
Check out your feeds! Hope your problem is resolved on Feedburner feeds not updating issue. Still not then proceed to the final step.

Step 5 Are you using cache plugin for WordPress

All the above steps didn’t help us and we finally found out that cache plugin is not updating the feeds. We use W3TC and in W3TC page cache options uncheck the box that says “cache feeds: site, categories, tags, comments”
Fix Feedburner feeds not updating issue in wordpress
Once done now again Resync your feeds which should fix the Feedburner feeds not updating issue in WordPress.
If you followed some other methods that resolved your problem then please let us know by commenting below.
Read More

Easiest Ways to insert .htaccess redirect http to https with Re-write Rules

Leave a Comment
The Apache module mod_rewrite allows you to rewrite URL requests that come into your server and is based on a regular-expression parser. The examples presented here show how to:
Direct requests for one subdirectory to a different subdirectory or the primary directory (document root)
Example: http://example.com/folder1/ becomes http://example.com/folder2/ or just http://example.com/.

Direct requests to a subdirectory

Example: http://example.com/file.html becomes http://example.com/folder1/file.html.
Add www to every request
Example: http://example.com becomes http://www.example.com. Or, convert http:// to https://.
Convert URL to all lowercase using Rewrite Map
Example: YourDomaIn.com/recIpeS.html becomes yourdomain.com/recipes
This will help prevent typos from producing http errors.
mod_rewrite
When implemented correctly, modrewrite is very powerful. There are many other applications for modrewritethat you can learn about at apache.org. Please reference their website for other possible rewrite scenarios.
These examples are provided as a courtesy - (mt) Media Temple does not design custom rewrite rules for individual customer websites.
INSTRUCTIONS
Create a plain text .htaccess file (click the link for details on this type of file), or add the lines from the example to the top of your existing .htaccess file.
Add the lines from the appropriate example to your file. Note that you should replace example text with your own information. Replace example.com with your own domain, folder1 with your own folder name, file.htmlwith your own file name, etc. Save your changes.
Use or to upload the file to the document root of the appropriate domain. If your domain is example.com, you should upload the file to:
/var/www/vhosts/example.com/httpdocs/
That's it! Once you've uploaded the file, the rewrite rule should take effect immediately.
Some Content Management Systems (CMSs), like WordPress for example, overwrite .htaccess files with their own settings. In that case, you may need to figure out a way to do your rewrite from within the CMS.
Direct requests for one subdirectory to a different subdirectory or the document root
http://example.com/folder1/ becomes http://example.com/folder2/ or just http://example.com/.
domains/example.com/html/folder2/ must exist and have content in it for this to work.
.htaccess
This .htaccess file will redirect http://example.com/folder1/ to http://example.com/folder2/. Choose this version if you don't have the same file structure in both directories:
Filename: .htaccess
Options +FollowSymLinks
RewriteEngine On
RewriteRule ^folder1.*$ http://example.com/folder2/ [R=301,L]
This .htaccess file will redirect http://example.com/folder1/ to plain http://example.com/. Choose this version if you want people redirected to your home page, not whatever individual page in the old folder they originally requested:
Filename: .htaccess.
Options +FollowSymLinks
RewriteEngine On
RewriteRule ^folder1.*$ http://example.com/ [R=301,L]
This .htaccess file will redirect http://example.com/folder1/file.html to http://example.com/folder2/file.html. Choose this version if your content is duplicated in both directories:
File name: .htaccess
Options +FollowSymLinks
RewriteEngine On
RewriteRule ^folder1/(.*)$ http://gs.mt-example.com/folder2/$1 [R=301,L]
Test
Upload this file to folder2 (if you followed the first or third example) or your html folder (if you followed the second example) with FTP:
Filename: index.html
Mod_rewrite is working!
Then, if you followed the first or second example, visit http://example.com/folder1/ in your browser. You should see the URL change to http://example.com/folder2/ or http://example.com/ and the test page content.
If you followed the third example, visit http://example.com/folder1/index.html. You should be redirected to http://example.com/folder2/index.html and see the test page content.
Code explanation
Options +FollowSymLinks is an Apache directive, prerequisite for modrewrite.
RewriteEngine On enables modrewrite.
RewriteRule defines a particular rule.
The first string of characters after RewriteRule defines what the original URL looks like. There's a more detailed explanation of the special characters at the end of this article.
The second string after RewriteRule defines the new URL. This is in relation to the document root (html) directory. / means the html directory itself, and subfolders can also be specified.
$1 at the end matches the part in parentheses () from the first string. Basically, this makes sure that sub-pages get redirected to the same sub-page and not the main page. Leave it out to redirect to the main page. (It is left out in the first two examples for this reason. If you don't have the same content in the new directory that you had in the old directory, leave this out.)
[R=301,L] - this performs a 301 redirect and also stops any later rewrite rules from affecting this URL (a good idea to add after the last rule). It's on the same line as RewriteRule, at the end.
DIRECT REQUESTS TO A SUBDIRECTORY
http://example.com/file.html becomes http://example.com/folder1/file.html.
Note: The directory folder1 must be unique in the URL. It won't work for http://example.com/folder1/folder1.html. The directory folder1 must exist and have content in it.
.HTACCESS
This .htaccess file will redirect http://example.com/file.html to http://example.com/folder1/file.html:
Filename: .htaccess
Options +FollowSymLinks
RewriteEngine On
RewriteCond %{HTTPHOST} example.com$ [NC]
RewriteCond %{HTTPHOST} !folder1
RewriteRule ^(.*)$ http://example.com/folder1/$1 [R=301,L]
Test
Upload this file to folder1 with FTP:
Filename: index.html
Mod_rewrite is working!
Then, visit http://example.com/ in your browser. You should see the URL change to http://example.com/folder1/ and the test page content.
Code explanation
Options +FollowSymLinks is an Apache directive, prerequisite for modrewrite.
RewriteEngine On enables modrewrite.
RewriteCond %{HTTP_HOST} shows which URLs we do and don't want to run through the rewrite.
In this case, we want to match example.com.
! means "not." We don't want to rewrite a URL that already includes folder1, because then it would keep getting folder1 added, and it would become an infinitely long URL.
[NC] matches both upper- and lower-case versions of the URL.
RewriteRule defines a particular rule.
The first string of characters after RewriteRule defines what the original URL looks like. There's a more detailed explanation of the special characters at the end of this article.
The second string after RewriteRule defines the new URL. This is in relation to the document root (html) directory. / means the html directory itself, and subfolders can also be specified.
$1 at the end matches the part in parentheses () from the first string. Basically, this makes sure that sub-pages get redirected to the same sub-page and not the main page. Leave it out to redirect to the main page of the subdirectory.
[R=301,L] - this performs a 301 redirect and also stops any later rewrite rules from affecting this URL (a good idea to add after the last rule). It's on the same line as RewriteRule, at the end.
ADD WWW OR HTTPS
http://example.com becomes http://www.example.com. Or, http://example.com becomes https://example.com.
.htaccess
This .htaccess file will redirect http://example.com/ to http://www.example.com/. It will also work if an individual file is requested, such as http://example.com/file.html:
Filename:.htaccess
Options +FollowSymLinks
RewriteEngine on
RewriteCond %{HTTP_HOST} ^example.com [NC]
RewriteRule ^(.*)$ http://www.example.com/$1 [R=301,L]
This .htaccess file will redirect http://example.com/ to https://example.com/. It will also work if an individual file is requested, such as http://example.com/file.html:
Filename: .htaccess
RewriteEngine On
RewriteCond %{SERVER_PORT} 80
RewriteRule ^(.*)$ https://www.example.com/$1 [R,L]
Test
Visit http://example.com in your browser. You should see that the same page is displayed, but the URL has changed to http://www.example.com (first example) or https://example.com (second example).
Also, http://example.com/file.html will become http://www.example.com/file.html or https://example.com/file.html.
Code explanation
Options +FollowSymLinks is an Apache directive, prerequisite for modrewrite.
RewriteEngine On enables modrewrite.
RewriteCond %{HTTP_HOST} shows which URLs we do and don't want to run through the rewrite.
In this case, we want to match anything that starts with example.com.
[NC] matches both upper- and lower-case versions of the URL.
RewriteRule defines a particular rule.
The first string of characters after RewriteRule defines what the original URL looks like. There's a more detailed explanation of the special characters at the end of this article.
The second string after RewriteRule defines the new URL. This is in relation to the document root (html) directory. / means the html directory itself, and subfolders can also be specified.
$1 at the end matches the part in parentheses () from the first string. Basically, this makes sure that sub-pages get redirected to the same sub-page and not the main page.
[R=301,L] - this performs a 301 redirect and also stops any later rewrite rules from affecting this URL (a good idea to add after the last rule). It's on the same line as RewriteRule, at the end.
CONVERT URL TO ALL LOWERCASE USING REWRITE MAP
This .htaccess rule will make sure that all characters entered into a url are converted to lowercase. This helps prevents errors caused by typos.
www.examPLe.com/recIPes becomes www.example.com/recipes
Note: Because this rule requires an edit to a server level configuration file, Grid and Managed WordPress users will not be able to implement this rule.
In order for this to work properly, you must also add a directive to your vhost file (httpd.conf):
RewriteMap lc int:tolower
For Plesk: Navigate to Domains > example.com > Web Hosting Settings > Additional Apache Directives, and place the above code.
Next, open your .htaccess and add the following lines:
RewriteEngine On
RewriteCond %{REQUESTURI} [A-Z]
RewriteRule . ${lc:%{REQUESTURI}} [R=301,L]
Note: Instead of using RewriteMap to convert URLs to lowercase, it is recommended by Apache that mod_spelling be used to ignore case sensitivities.
Test
Navigate to your domain using a combination of uppercase and lowercase letters.
Code Explanation
RewriteEngine On enables modrewrite.
RewriteCond %{REQUESTURI} [A-Z] - Grabs the entered address.
RewriteRule . ${lc:%{REQUEST_URI}} - Uses the 'lc' variable that was added to the vhost file to convert all characters to lowercase.
[R=301,L] - Performs a 301 redirect and also stops any later rewrite rules from affecting this URL (a good idea to add after the last rule). It's on the same line as RewriteRule, at the end.
Regular expressions
Rewrite rules often contain symbols that make a regular expression (regex). This is how the server knows exactly how you want your URL changed. However, regular expressions can be tricky to decipher at first glance. Here's some common elements you will see in your rewrite rules, along with some specific examples.
^ begins the line to match.
$ ends the line to match.
So, ^folder1$ matches folder1 exactly.
. stands for "any non-whitespace character" (example: a, B, 3).
* means that the previous character can be matched zero or more times.
So, ^uploads.$ matches uploads2009, uploads2010, etc.
^.$ means "match anything and everything." This is useful if you don't know what your users might type for the URL.
() designates which portion to preserve for use again in the $1 variable in the second string. This is useful for handling requests for particular files that should be the same in the old and new versions of the URL.
See more regular expressions at perl.org.
TROUBLESHOOTING
404 NOT FOUND
Examine the new URL in your browser closely. Does it match a file that exists on the server in the new location specified by the rewrite rule? You may have to make your rewrite rule more broad (you may be able to remove the $1 from the second string). This will direct rewrites to the main index page given in the second string. Or, you may need to copy files from your old location to the new location.
If the URL is just plain wrong (like http://example.com/folder1//file.html - note the two /s) you will need to re-examine your syntax. (mt) Media Temple does not support syntax troubleshooting.
INFINITE URL, TIMEOUT, REDIRECT LOOP
If you notice that your URL is ridiculously long, that your page never loads, or that your browser gives you an error message about redirecting, you likely have conflicting redirects in place.
You should check your entire .htaccess file for rewrite rules that might match other rewrite rules. You may also need to check .htaccess files in subdirectories. Note that FTP will not show .htaccess files unless you have enabled the option to view hidden files and folders. See our .htaccess article for details.
Also, it's possible to include redirects inside HTML and PHP pages. Check the page you were testing for its own redirects.
Adding [L] after a rewrite rule can help in some cases, because that tells the server to stop trying to rewrite a URL after it has applied that rule.
.htaccess redirect inserted by Really Simple SSL
Really Simple SSL has an option which inserts the detected .htaccess redirect rules. There are several server configurations, which each require their own .htaccess redirect. The plugin tries to detect which rule applies, and then tests the result. In some cases the test fails, or the .htaccess was not writable. In that case, you’ll have to insert the .htaccess redirect yourself. I would always recommend to redirect with .htaccess, as this is a slightly faster redirect than the default interal 301 redirect.
Enable “stop editing htaccess”
If the plugin can’t test the .htaccess redirect rule, it writes an empty set of rules to the .htaccess when you load the settings page. To prevent overwriting your manually added .htaccess, enable this setting.
SSL test page
If you go to https://www.yourdomain.com/wp-content/plugins/really-simple-ssl/ssl-test-page.php (use https, not http), you will see a page with some test results. This will look something like this:
This page is used purely to test for ssl availability.

SERVER-HTTPS-ON# (on)

SERVERPORT443

SUCCESFULLY DETECTED SSL

In this case, you can see ssl is functioning, and the server variable server[“https”]=on.
Depending on this output, you should add a corresponding redirect rule to your .htaccess file
If this page is not working for your for some reason, you’ll have to find out by trial and error.
If this page shows “successfully detected SSL”, but you do not see any detected variables, no server configuration I know about was found, so none of the below may apply. You’ll just have to try.
If you find another redirect rule which works for you, please let me know so I can improve the plugin and this documentation.
Where do I find the .htaccess file?
Open your FTP client (filezilla, or any other), go to your webroot (where you can see the WordPress files like wp-admin, wp-content), and look for the .htaccess file. Be sure to check that your ftp client shows hidden files as well.
What codesnippet do I need to add?
Add every codesnippet above the WordPress .htaccess lines. If Really Simple SSL added any rules which caused a redirect loop, remove them and set the Really Simple SSL settings to “stop editing the .htaccess file”.
If you see #SERVER-HTTPS-ON# (on), add
RewriteEngine on
RewriteCond %{HTTPS} !=on [NC]
RewriteRule ^(.)$ https://%{HTTP_HOST}%{REQUEST_URI} [R=301,L]
If you see #SERVER-HTTPS-ON# (1), add
RewriteEngine on
RewriteCond %{HTTPS} !=1
RewriteRule ^(.)$ https://%{HTTPHOST}%{REQUESTURI} [R=301,L]
If you see #SERVERPORT443#, add
RewriteEngine on
RewriteCond %{SERVERPORT} !443
RewriteRule ^(.*)$ https://%{HTTPHOST}%{REQUEST_URI} [R=301,L]
If you see #LOADBALANCER#, add
RewriteEngine on
RewriteCond %{HTTP:X-Forwarded-Proto} !https
RewriteRule ^(.*)$ https://%{HTTPHOST}%{REQUESTURI} [R=301,L]
If you see #CDN#, add
RewriteEngine on
RewriteCond %{HTTP:X-Forwarded-SSL} !on
RewriteRule ^(.*)$ https://%{HTTPHOST}%{REQUESTURI} [R=301,L]
If you see #Cloudflare#, add
RewriteEngine on
RewriteCond %{HTTP:CF-Visitor} ‘”scheme”:”http”‘
RewriteRule ^(.*)$ https://%{HTTPHOST}%{REQUESTURI} [R=301,L]
If you see #ENVHTTPS#, add
RewriteEngine on RewriteCond %{ENV:HTTPS} !=on
RewriteRule (.*) https://%{HTTPHOST}%{REQUESTURI} [R=301,L]
On the bottom of the ssl test page, you will see HTTP HOST. This should be the same as your domain. If not, you might need to hardcode your domain to prevent redirect issues, like this:
RewriteEngine on
RewriteCond %{HTTPS} !=on [NC]
RewriteRule ^(.*)$ https://domain.com/$1 [R=301,L]










Read More

Which is better for bloggers: WordPress vs Drupal

Leave a Comment
Before going to the main topic , I just want to give basic of the most popular 2 CMS (content management system) Drupal and Wordpress.  Drupal is a free and open-source content-management framework written in PHP and distributed under the GNU General Public License . Dries Buytaert had initially released in January 2001. WordPress is another free and open-source content management system (CMS) based on PHP and MySQL. Features include a plugin architecture and a template system and it was released by Matt Mullenweg in May 2003.

Which is better for bloggers: WordPress vs Drupal


As above given basic information says that both were released only a couple of years apart, WordPress and Drupal are big players in the CMS market but WordPress has gained a lot more popularity over the years. Its user base is almost 10 times that of Drupal – but is it 10 times better?

Like with any technology debates, each side has its loyal followers. As a WordPress advocate, you’ll be happy to know that I’ve done my research on both sides and will be presenting an argument for each here. The answer in the WordPress vs. Drupal discussion really comes down to level of skill. And succinctly: Drupal has more features that are brilliant if you know how to use them, but useless and confusing if you don’t.

Let’s go into the detail.

Ease Of Use

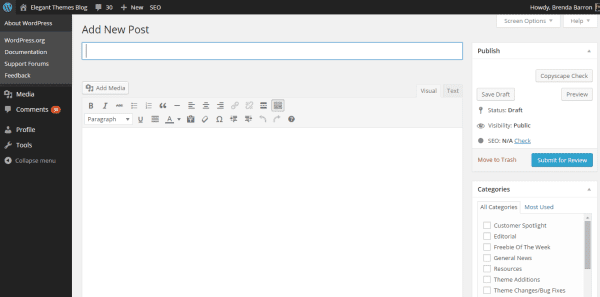
A deciding factor on which to choose could be how easy it is to use. If you know you have limited knowledge of website development and you need to get to grips with your CMS straight away, put simply there’s no point in choosing Drupal. Its back end is a lot more complicated than WordPress’ user-friendly one. With WordPress, you can start blogging in minutes using the WYSIWYG editor.


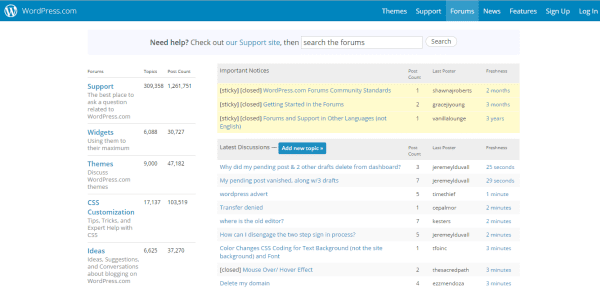
Another advantage of WordPress is the brilliant community who are there to help you with queries. Such passionate people want to give others advice based on their own experience, which is great for learning how to make your website better. Drupal has a community too and it’s in no way small; it’s just smaller than the one WordPress has.


When it comes to upgrades – which WordPress does every 3-4 months – WordPress does this seamlessly without you needing to worry about a thing. Drupal’s upgrades don’t include the code. So again, you’ll need the developer knowledge to handle this. Some upgrades require a whole redesign.

If editing on the go, WordPress has a brilliant mobile app, which lets you write, edit, and post articles as easy as if you were on your laptop or PC. Drupal’s interface is responsive, so it’s also really easy to use; it just doesn’t have an app.
Customizing Options

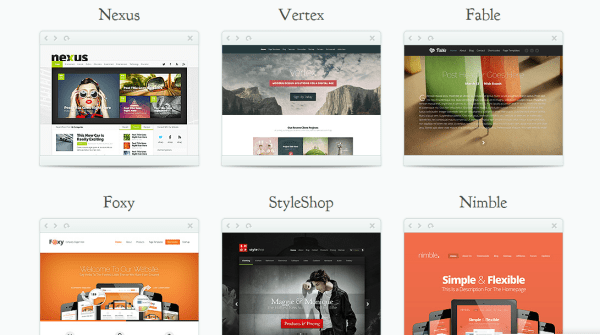
The easiest way to customize your website is through themes and plugins. Adding these takes it from being a blank canvas to something that fits your individual needs. WordPress is the winner here, as it has nearly 37,000 plugins and a variety of free and premium themes. The premium themes let you change almost every aspect of the website, making this is highly customizable option. Check out the themes we offer at Elegant Themes here.


The reason why there are so many plugins is because the huge open-source developer community has developed them for their fellow WordPress friends. It’s these plugins that make WordPress so flexible. You can use WordPress if you want to run a simple blog, have a portfolio to share, showcase your business, or host an e-commerce store.

Drupal offers this flexibility on page types without the need for plugins. However, if you want the convenience of using a plugin, Drupal uses modules instead of plugins and the good ones don’t come for free. Plus, there are limited themes available, so you’ll need to seek out a designer to help you turn your site into something pretty.

A developer can create something that’s unique and data-rich through Drupal, whereas there’s always the possibility that your website can look like your neighbor’s (or competitor’s) if you opt for a free theme from WordPress. This can be the easy route – it’s customizable, but is it enough?
Cost

Drupal developers are less easy to get ahold of than WordPress developers and can therefore charge a lot more. They will have had to go through the steep learning curve of getting to know Drupal and they’ll be looking for payback. And remember, you’ll very likely have to fork out this expense unless you’re a technical whizz yourself and are able to build your own website.

They’re both free to download, but the premium plugins and themes for Drupal cost a lot more than WordPress, whereas there are a lot of free options on the WordPress market.

Bear in mind that if your website grows, you’ll need significant server resources to hold it up if using WordPress.
Security

Drupal wins this round. WordPress’ many plugins can have vulnerabilities and be easily hacked, particularly if the website owner doesn’t update to the latest version or the plugin gets old. Or simply, hackers target WordPress because it is so popular. However, there is a paradox solution: install third-party plugins that increase your security.

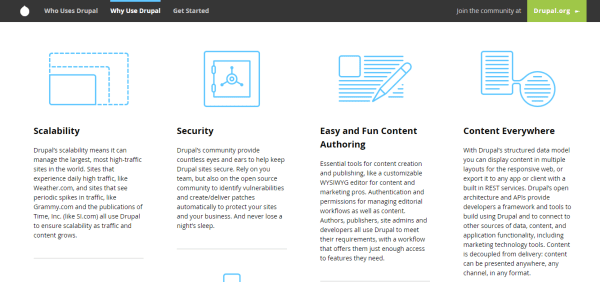
Drupal has enterprise-level security and provides in-depth security reports, hence why you’ll find governments using it.

The Size Issue

Drupal can support anything from a one-page static site to something that has thousands of pages and thousands of readers reading those pages simultaneously.

As WordPress was originally designed as a blogging platform, its ability to handle really large volumes of content has been affected and can create a slower experience.
Which Does Google Prefer?

Search Engine Optimization isn’t platform specific but there are a few tricks that make one better than the other. Both have SEO built into them. It has been said that Drupal was built specifically to be search engine friendly but WordPress has a multitude of plugins that can enhance this.

Drupal’s pages tend to load faster due to its default caching features, and search engines put a preference on faster websites. Drupal is also able to handle larger amounts of content. A large volume of useful content is important for SEO.

One big difference between the two is how they handle mobile sites. Many of Drupal’s mobile themes run better off a subdomain, which creates two separate URLs to index in search engines i.e. www.yourdomain.com and www.m.yourdomain.com. WordPress doesn’t have this issue as most of its themes are mobile responsive.


Multiple Authors

If your website is to be used as a publishing platform and you need the ability to let multiple authors log in, create a profile, and post articles then WordPress is better for this.

There are various types of suggested authors, from Subscribed where you can simply view the content, to Editor who can edit other’s work. Of course, there are also the Admins who control the site. As an Admin, you can also edit the capabilities of each of the users and create new roles, making WordPress incredibly flexible in this area. You’re also able to add roles within Drupal, but there are fewer standard roles set up already.

Drupal comes with a basic revision solution, so multiple authors can work on an article at the same time and see the tracked edits. WordPress needs plugins to be able to do this, but there are many competent versions available.
Who Uses Each System?

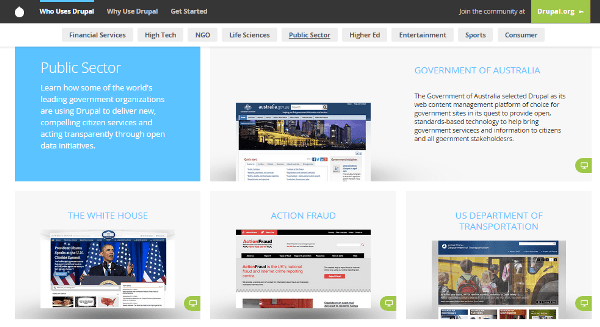
Drupal boasts The White House and The Economist as users, whereas WordPress has The New York Times and CNN. Because of the varying benefits already discussed, WordPress is the obvious choice for creative websites and publishing content, and Drupal is good for those who need a stable and scalable website without prioritizing aesthetics.


Overall, developers take to Drupal because it is powerful and flexible, so they can work their magic on it and create their own solutions. Bloggers and small businesses that don’t have the knowledge or time and want something really simple to use will opt for WordPress.

It’s perhaps because of this reason – the larger proportion of bloggers and small businesses over developers and those who pay developers – that WordPress has so many more downloads than Drupal.

And The Winner Is…

I’ll leave it up to you to make your final decision as you need to consider what you’re using your site for and where you think you’ll be in the future.

For instance, if you’re a creative agency, you’ll want to project your unique designs, so Drupal might be your choice. Drupal comes in at the top again if you hold lots of data for your own company or clients, since security will be a top priority. And if SEO is part of your marketing strategy, Drupal will work best because of its ability to handle lots of content and provide a quick page load.

If you want to create a multi-author publishing platform, you’ll be better off with WordPress. Just make sure you’ve estimated how big your site will become, as Drupal can handle larger sites better. It’s possible to switch later once you’ve grown, but it’s obviously simpler not to.

The main factor – and it’s a big one – is the ease of use. If you don’t have the experience to develop your own website, or don’t have the time or money to pay someone else to, WordPress is the option for you. You can basically ignore the extra features of Drupal!

Drupal was designed with developers in mind and so the design possibilities are endless. Developers are actively encouraged to come up with their own solutions. But this developer-friendly aspect is intimidating for the lay-man, and so it’s a strength and a weakness at the same time.

Have you had experience of WordPress and Drupal and agree with the comparison? Would you consider switching between the two? Let me know in the comments below!

Note: Article thumbnail image by retrorocket / shutterstock.com
Read More

Monetize Blog Content: Everything You Should Know

Leave a Comment
As per available information says that the blogging can be a fun pastime, but if you want to make it more than that, you have to be creative. Making your blog into a profitable entity is not easy, but it can be a massive deal if you get it right. If you want to turn your site into a business, you need to be quite savvy when it comes down to it. I have put together a few tips that will help you. Remember, this process will take some time to get off the ground.

Monetize Blog Content: Everything You Should Know


Monetize Your Blog: Everything You Should Know 

Create an outstanding blog first

When you create your blog, you need to make sure that it is appealing and functional. Before you start, you might want to read a WordPress guide to get all the information you will need. I found an engaging guide online, and you can check it out here. Once you know the ground rules, you can begin to create a site that your audience will love. I can't stress how important this step is. You need to be something of a perfectionist if you want to get things on track.

Optimize your posts

Are your posts SEO friendly? If you never optimize your posts, you will have an issue with your Google rank. Remember, if you want to make some profits, you need to have a high rank on Google. Otherwise, no one will take your site seriously. You should learn some of the core SEO rules so that your posts are excellent. Once you start to educate yourself in this area, you will see that it is easier than you first imagine it to be.

Consider sponsored posts

Do you want to get some sponsored posts on your site? It may surprise you to learn that some PR agencies will pay you to put posts on your blog. If you want to get a sustainable income, this idea is a great one for you. These posts will likely advertise a product or service. You will need to write about this thing and publish it on your site. That way, you can encourage your readership to buy particular products online. Your influence is invaluable to companies - remember that.

Use Google Ads for profit

Another option is to use Google Ads so that you can get some cash. These adverts are PPC. That means that when someone clicks on the advert, you make a particular amount of money. Be aware that the amount might not be all the much. In the long run, though, you should find that all those little clicks add up. When you learn a little about pay per click advertising, you will see that it's an easy way to get an income.

Think like an entrepreneur

Finally, you need to think like an entrepreneur. If you want to make decent profits, you need to be business-minded from the offset. That means that you should always look for new business opportunities. Once you start doing that, nothing will stop you getting what you want.


Read More

Create and run an Android Virtual Device on PC or laptop

Leave a Comment
Normally bloggers are programmers and IT experts, so they have to test their developed programs in PC or laptop. You might be itching to run some code, but first you must have something that can run an Android program: either an Android device (a phone, a tablet, an Android-enabled toaster — whatever) or a virtual device. An Android Virtual Device (AVD) is a test bed for Android code on the development computer.


The Android SDK comes with its own emulator — a program that behaves like a phone or a tablet but runs on the development computer. The emulator translates Android code into code that the development computer can execute. But the emulator doesn’t display a particular phone or tablet device on the screen.

The emulator doesn’t know what kind of device you want to display. Do you want a camera phone with 800-x-480-pixel resolution, or have you opted for a tablet device with its own built-in accelerometer and gyroscope? All these choices belong to a particular AVD. An AVD is simply a bunch of settings, telling the emulator all the details about the device to be emulated.

Before you can run Android apps on your computer, you must first create at least one AVD. In fact, you can create several AVDs and use one of them to run a particular Android app.

To create an AVD, follow these steps:


1. In the Eclipse main menu, choose Window→Android Virtual Device Manager.

The Android Virtual Device Manager window opens.

2. In the Android Virtual Device Manager window, click New, as shown in the figure.

The Create New Android Virtual Device (AVD) window opens. That’s nice!


3. In the AVD Name field, type a new name for the virtual device.

You can name your device My Sweet Petunia, but in the figure, the device is named Nexus7_Android4.2. The name serves as a reminder of this device’s capabilities.

4. In the Device drop-down menu, select a device type.

In this figure, Nexus 7 (7.27″, 800 x 1280: tvdpi) is selected.


5. Determine the kind of secure digital (SD) card your device has.

In the figure, an SD card with a modest 1000 MiB, which is roughly 1 gigabyte, is selected. Alternatively, you could select the File radio button and specify the name of a file on your hard drive. That file would be storing information as though it were a real SD card on a real device.

6. Leave the other choices at their defaults (or don’t, if you don’t want to) and click the Create AVD button.

The computer returns you to the Android Virtual Device Manager window, where you see a brand-new AVD in the list, as shown in the figure.


And that does it! You’re ready to run your first Android app.
Read More

Productive alternative ways for entrepreneurs and investor less funding

Leave a Comment
Working as a startup employee is lot more different from being part of a big MNC or corporate company because the work here is not defined and specific. However, startups are booming as always and are becoming the preference of job seekers for the unmatched fun with work culture it provides. But then again, it is not easy to cater to your startup business and its needs. The journey and work becomes lot more easier when you have the best of resources, employees, talent, investments and work culture on board.

Productive alternative ways for entrepreneurs and investor less funding


Raising money is often the toughest part of starting a business, and it’s also the most important. The majority of small businesses that fail within the first few months have one simple thing in common — they run out of money.

The software world is famous for high-profile funding rounds and enormous valuations. But the reality is that most small businesses don't secure equity-based funding, and it doesn’t always make sense to chase down a venture capital investor. Traditional fundraising takes a lot of time — taking away valuable time that you could be spending developing your product and supporting your customers. There’s also the important issue that as you continue fundraising, you’ll own less and less of your company.

Here are a few alternatives for getting your business off the ground without pursuing VC funding.

1. Don’t quit your day job until you start making money in your startup

Keeping your day job is one of the safest ways to keep up with your rent or mortgage payments while you build out your new business. If you decide to take this route, make sure you fully understand your employee contract — particularly any guidelines regarding a non-compete clause or after-hours work.

Financially, this is one of the least risky options to fund your business, but the long days can take their toll on you and it can be emotionally tiring to feel pulled in so many different directions. If you’re truly passionate and excited about your business idea, it’s a lot easier to dedicate one or two weeknights and a weekend day to the startup.

2. Bootstrap and keep your costs low

No matter how big your bank account may be, it’s Business Management 101 to make sure your expenses are realistic for your budget. Don’t listen to all the “go big or go home” or “spend money to make money” speeches: you need to do whatever you can to keep your overhead costs as low as possible at the beginning.

Work out of your home, or co-locate with another company or business incubator. Delay any capital purchases that aren't absolute necessities, and think about leasing when possible. Hire interns from local schools (don’t forget that an intern doesn’t equal free labor; you’ll need to invest some time to help them grow their skills and experience). And always negotiate your fees and terms with any vendors.

3. Reinvest any profits back into the business

If your business is profitable, you can reinvest any profits back into your business and feed your growth through your cash flow. As you continue to grow, you can reinvest into additional people, equipment, marketing, etc. The downside is that relying on your company’s revenue means you can only grow as fast as your sales.

4. Get a private loan

One of the advantages about bootstrapping is that once you reach a certain level of revenue and cash flow, it’s much easier to find a bank or other institutional lender that’s willing to lend to you. Banks aren’t known for taking risks with their funds, so your business will need a solid credit history and revenue to qualify. You may have the greatest chance of being approved if you approach a local bank or somewhere you already have a banking relationship.

5. Reach out to family and friends

For many, tapping into a friends and family round can be a logical starting point for their fundraising. You most likely won’t have to spend a month putting together a 100-page business plan to convince your mom that your brilliant idea deserves some backing. However, mixing money and relationships is full of pitfalls. You may find yourself getting lots of unwanted advice and having family get-togethers that start to feel more like awkward investor meetings.

If you do end up borrowing money from family or friends, make sure that you’re completely transparent about the associated risk and the expected roles and involvement for any investors. Most importantly, never take money that your friend or family member can’t afford to lose.

6. Crowdfund Instantly

Crowdfunding is not right for every business idea and maybe you’ll just end up raising a couple of thousand dollars from your friends and friends of friends, but sites like Kickstarter or Indiegogo can be a compelling option to explore.

In addition to the obvious benefit of getting you some much-needed capital, crowdfunding can help a budding company in other ways too: it forces you to start building your brand and engaging from the start. You’ll grow a customer base, get more exposure, and get real-world validation about your idea.

Here are some ways when you can make the most of the available resources and make your startup a big success, reports ET.


7. Sketch out a Plan

The purpose of the startup should be clear and goals should be made transparent to the workers. Job seekers look for companies that have fixed targets and goals and are passionately driven towards it as this ensures their personal growth.

8. Equip yourself with Latest Technology

The workers should be aware of the latest technologies and should be skilled to use them for work execution. Latest technological tools help forming bigger networks, problem solving, finding resources and much more. If you have the vision but not the power of technology, things become difficult.

9. Putting Employee First

Employees are the ones who can either make or break your business. Their satisfaction should always be your priority because they are the ones who ensure that your customers receive the best of service. The Employee-First Culture is trending in the business space. This helps in employee retention, increase profitability and producing more loyal workers.

10. Be a Hands-on Leader

You need to keep your employees engaged by giving them interesting work to achieve certain targets meeting the deadlines. Try to understand the perspective of your employee during crisis to gauge the situation.

11. Create your Tradition

Rather joining the bandwagon, create and introduce your own traditions that you think would promote productivity at your startup. Work hard with workers but do not forget to celebrate the success as well. This unites the team and motivates them to do better and treat the company as their own.

Bottom Lines:

The bottom line is money is important to every business, but you don’t necessarily need a multi-million dollar seed or Series A round in order to launch.
Read More
Next PostNewer Posts Previous PostOlder Posts Home